• Recent Posts

  • Archives

  • Categories

  • Twitter

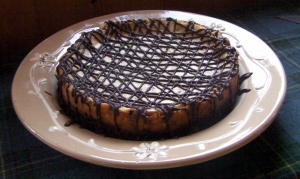
Chocolate Chip Cheesecake

I can’t believe it has been more than two weeks since my last post!  I have missed my little blog but have been trying to bake less in the New Year since everyone in my household overindulged during the Holiday season.  I figure it is about time to break those Resolutions and get back to eating the good stuff though.

I think you might want to start with this cheesecake, it is amazing!  The filling is very dense and studded with mini chocolate chips.  The crust is made from gluten free chocolate cookies and instant coffee.  I think this might be the best egg-less cheesecake I have ever made and I will definitely be making it again soon.  Make this a day ahead of serving since it needs to chill overnight for the best texture.

Chocolate Chip Cheesecake

Adapted from The Food Network Magazine

Crust:

10oz gluten free chocolate cookies (I used Nana’s Fudge Cookie Bites, but you can use your favorite)

1/4 cup sugar

1 Tbsp instant coffee

6 Tbsp melted butter

Pre-heat the oven to 350*F.  Grind cookies and sugar in food processor.  Add the instant coffee to the melted butter and mix until the coffee is dissolved.  Add the butter to the food processor and mix until all the crumbs are moist.  Pour into 10″ spring form pan and pat evenly along the bottom (don’t try to press crumbs up the sides or they will fall and you will have a really thick edge.)  Bake for 8-10 minutes and then let cool while you make the filling.

Filling:

1 pkg aseptic firm silken tofu

1 1/2 lbs cream cheese (3 8oz pkgs)

1 cup sugar

1 cup mascarpone

1 tsp vanilla

1/4 tsp salt

1 cup mini chocolate chips plus 1/2 cup for decoration

In a food processor or with your mixer, blend the tofu until smooth.  Add the cream cheese, sugar and mascarpone and blend until smooth and well incorporated, make sure you scrape down the sides of the bowl a couple of times.  Add the vanilla and salt and blend again briefly until well mixed.  Fold in the chocolate chips and pour into your prepared crust.  Bake at 350*F for 65-70 minutes, the center will still be very jiggly but the top will have just started to darken when it is done.   Let cool overnight in the refrigerator.   Before you serve the cheesecake, melt the remaining 1/2 cup of chocolate chips in the microwave for 30 seconds and then stir until smooth, pour into a plastic sandwich bag and snip off one corner.  Use this to drizzle the chocolate over the cake in a decorative pattern.   Serves 8-10.

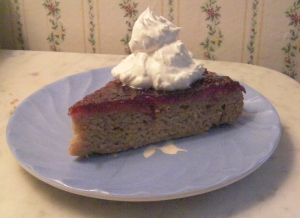
Cranberry Upside Down Cake

We had a wonderful Christmas this year, it was especially nice to have a baby in the house.  She was more interested in the wrapping paper and boxes that the presents but I am sure that won’t last too long!

Our Christmas dinner was a very local affair, my parents and grandparents ate chicken from a local farmer, we had potatoes, beets, carrots and cranberries from our land and squash, onions, and apples from other local farms.  I even picked the lemons we used on our recent trip to Arizona!  It was a wonderful meal and this cake was the perfect way to finish it off.  It is a pretty dense cake, I got the recipe from my husbands grandmother, and it pairs really well with the cranberry.  It is lightly lemon flavored and just sweet enough.

Cranberry Upside Down Cake

Adapted from a recipe by Mary Bates

2 cups cranberries, fresh or frozen

1 1/2 cups agave, divided

2 cups flour

4 tsp baking powder

1 tsp salt

1 aseptic container of silken firm tofu

1 tsp lemon extract

1 tsp vanilla extract

zest of 1 lemon

In a medium saucepan combined the cranberries and 3/4 cups agave.  Cook over medium heat until the cranberries pop and the sauce thickens.  Pour in to greased 9 inch springform pan, spread evenly over the bottom and let cool.

Pre-heat the oven to 350*F.  Line a cookie sheet with tinfoil and place on the middle shelf of the oven.  In a medium bowl combined the flour, baking powder and salt.  In a blender or food processor, blend the remaining 3/4 cup agave, tofu, extracts and lemon zest.  Blend until smooth.  Gently combined the wet and dry ingredients, being careful not to over mix.  The batter will be thick so spoon it over the cool cranberry sauce and spread out gently with a spatula.  Bake for 40-45 minutes or until a toothpick comes out clean.  Let cool for 15 minutes and then remove the ring of the springform pan and turn the cake out on to a platter to cool completely.  Serves 8 generously.

Daring Bakers Challenge: Gingerbread House

I was so excited to find that this months Daring Bakers’ Challenge was to make Gingerbread houses, how fun!
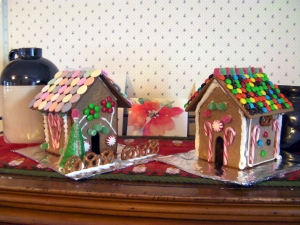
The December 2009 Daring Bakers’ challenge was brought to you by Anna of Very Small Anna and Y of Lemonpi. They chose to challenge Daring Bakers’ everywhere to bake and assemble a gingerbread house from scratch. They chose recipes from Good Housekeeping and from The Great Scandinavian Baking Book as the challenge recipes.

This was actually much more fun and relaxing than I thought it would be.  I was prepared to spend a whole day being frustrated and crying over broken gingerbread.  I used Y’s recipe, it was more of a spice dough than a gingerbread, as there was no molasses in it.  It was a little dry, I might add a touch more water next time, but it was enough for two small houses and two dozen cookies.  I used the Gingerbread House 1 template that I found online here.  I forgot to trim it after it came out of the oven but it ended up fine.

I think the thing that made this whole thing easy was using the sugar syrup to hold the houses together.  There was way too much of it, I would make a half or quarter batch next time but it was so helpful.  I didn’t have to worry about the icing drying before I could move on to the next part.
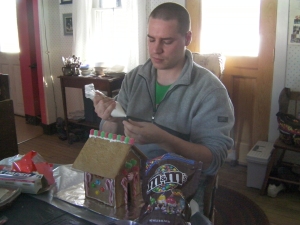
David was excited to help me with this project and we started in the morning by decorating the sides of the houses I had baked the night before.  We decorated them flat and then when they were dry after a couple of hours, I used the sugar syrup to put them together.
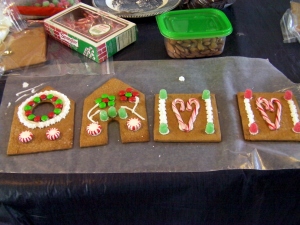
My gingerbread house
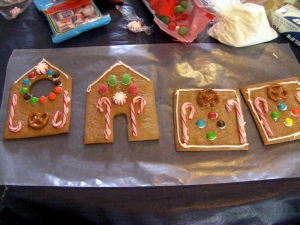
David's gingerbread house

After the sugar had hardened, only a couple of minutes, I added the roofs using icing.  The regular Royal icing that is used is made with egg whites so I found a vegan recipe online.  Making the icing was the most frustrating part of the whole day.  I don’t know if I measured wrong or if the recipe is wrong but I added too much sugar to begin with and had to add more water but once it was the right consistency it worked great.  This was so much fun I think we are going to make it a tradition to make houses on Christmas Eve.

Merry Christmas!
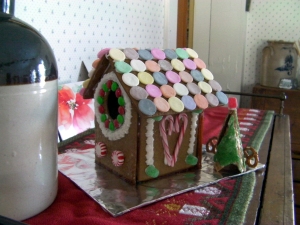
My Gingerbread House
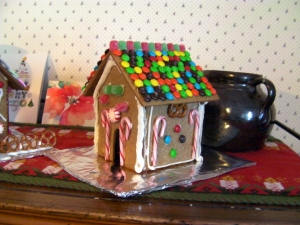
David's Gingerbread House

Anna’s Recipe:
Spicy Gingerbread Dough (from Good Housekeeping) http://www.goodhousekeeping.com/recipefinder/spicy-gingerbread-dough-157…

2 1/2 cups (500g) packed dark brown sugar
1 1/2 cups (360mL) heavy cream or whipping cream
1 1/4 cups (425g) molasses
9 1/2 cups (1663g) all-purpose flour
2 tablespoon(s) baking soda
1 tablespoon(s) ground ginger

Directions

1. In very large bowl, with wire whisk (or with an electric mixer), beat brown sugar, cream, and molasses until sugar lumps dissolve and mixture is smooth. In medium bowl, combine flour, baking soda, and ginger. With spoon, stir flour mixture into cream mixture in 3 additions until dough is too stiff to stir, then knead with hands until flour is incorporated and dough is smooth.

2. Divide dough into 4 equal portions; flatten each into a disk to speed chilling. Wrap each disk well with plastic wrap and refrigerate at least 4 hours or overnight, until dough is firm enough to roll.

3. Grease and flour large cookie sheets (17-inch by 14-inch/43x36cm)

4. Roll out dough, 1 disk at a time on each cookie sheet to about 3/16-inch thickness. (Placing 3/16-inch dowels or rulers on either side of dough to use as a guide will help roll dough to uniform thickness.)

5. Trim excess dough from cookie sheet; wrap and reserve in refrigerator. Chill rolled dough on cookie sheet in refrigerator or freezer at least 10 minutes or until firm enough to cut easily.

6. Preheat oven to 300 degrees F (149C)

7. Use chilled rolled dough, floured poster board patterns, and sharp paring knife to cut all house pieces on cookie sheet, making sure to leave at least 1 1/4 inches between pieces because dough will expand slightly during baking. Wrap and reserve trimmings in refrigerator. Combine and use trimmings as necessary to complete house and other decorative pieces. Cut and bake large pieces and small pieces separately.

8. Chill for 10 minutes before baking if the dough seems really soft after you cut it. This will discourage too much spreading/warping of the shapes you cut.

9. Bake 25 to 30 minutes, until pieces are firm to the touch. Do not overbake; pieces will be too crisp to trim to proper size.

10. Remove cookie sheet from oven. While house pieces are still warm, place poster-board patterns on top and use them as guides to trim shapes to match if necessary. Cool pieces completely before attempting to assemble the house.

Y’s Recipe:
Scandinavian Gingerbread (Pepparkakstuga)
from The Great Scandinavian Baking Book by Beatrice Ojakangas http://astore.amazon.com/thedarkit-20/detail/0816634963

1 cup butter, room temperature [226g]
1 cup brown sugar, well packed [220g]
2 tablespoons cinnamon
4 teaspoons ground ginger
3 teaspoons ground cloves
2 teaspoons baking soda
½ cup boiling water
5 cups all-purpose flour [875g]

1. In a large bowl, cream the butter and sugar until blended. Add the cinnamon, ginger and cloves. Mix the baking soda with the boiling water and add to the dough along with the flour. Mix to make a stiff dough. If necessary add more water, a tablespoon at a time. Chill 2 hours or overnight.

2. Cut patterns for the house, making patterns for the roof, front walls, gabled walls, chimney and door out of cardboard.

3. Roll the dough out on a large, ungreased baking sheet and place the patterns on the dough. Mark off the various pieces with a knife, but leave the pieces in place.

4. [I rolled out the dough on a floured bench, roughly 1/8 inch thick (which allows for fact that the dough puffs a little when baked), cut required shapes and transferred these to the baking sheet. Any scraps I saved and rerolled at the end.]

5. Preheat the oven to 375’F (190’C). Bake for 12 to 15 minutes until the cookie dough feels firm. After baking, again place the pattern on top of the gingerbread and trim the shapes, cutting the edges with a straight-edged knife. Leave to cool on the baking sheet.

Simple Syrup:
2 cups (400g) sugar

Place in a small saucepan and heat until just boiling and the sugar dissolves. Dredge or brush the edges of the pieces to glue them together. If the syrup crystallizes, remake it.

Gingerbread Cake

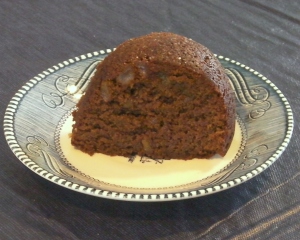
I made this for my grandfather’s 89th birthday this month.  We had a wonderful party and this cake was a big hit.  My uncle even said it was the best gingerbread he had ever had!  I think the best part is the little pieces of candied ginger spread throughout the cake, it is very nice to bite into one and get a burst of ginger.  I wish I had gotten some better pictures, the cake looked very pretty sprinkled with powdered sugar before we cut into it.

Gingerbread Cake

Adapted from Post Punk Kitchen

2 1/2 cups flour

2 Tbsp ginger

2 tsp cinnamon

2 tsp baking powder

1 tsp baking soda

1/2 tsp ground cloves

1/2 tsp salt

1/2 cup chopped crystallized ginger

1 cup oil

2/3 cup molasses

1 cup agave

1/2 cup milk

1/4 cup yogurt

zest of one lemon

Preheat the oven to 350*F.  Grease and flour a bundt pan.  In a medium bowl, whisk together the flour, spices, baking powder, baking soda and salt.  Add the crystallized ginger.  In a large bowl, whisk together the oil, molasses, agave, milk, yogurt and zest.  Add the dry ingredients to the wet ingredients in two batches, stirring after each addition.  Pour into prepared bundt pan and bake for 40-45 minutes or until a tester comes out clean.  Let cool in pan for ten minutes and then flip out on to a cooling rack and cool completely.  Top with powdered sugar if desired.  Serves 12-14.

Pumpkin Pie

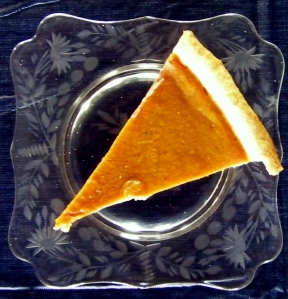
My husband David LOVES pumpkin pie and only his mother’s pumpkin pie.  Our biggest food related fight was about pumpkin pie and how I couldn’t make it as good as his mother.  Luckily, Cathy was willing to share the recipe with me (THANK YOU!) and after making it for the last eight years or so I have managed to satisfy David with a pie as good as his mothers.  This is a great pumpkin pie, it firms up wonderfully and you don’t miss the eggs at all.  The key is not to skimp on the pumpkin, one can has a cup and three-quarters but you need a full two cups.  I usually double this recipe to get two pies, then David can have one and the rest of us can share.

Vegan Pumpkin Pie

2 cups pumpkin puree (not pumpkin pie filling)

1/2 tsp cinnamon

1/2 tsp ginger

1/2 tsp nutmeg

1/2 tsp salt

1 1/2 Tbsp butter or margarine

1 cup brown sugar

1 Tbsp vanilla extract

1/3 cup cornstarch

1 1/2 cups milk

1 Tbsp white flour

1 unbaked 9″ pie shell

Preheat the oven to 450*F.  In a saucepan mix together the pumpkin, spices, salt, butter, sugar and vanilla.  In a small bowl mix the cornstarch with the milk.  Heat the pumpkin mixture over medium heat, stirring constantly until hot.  Add the cornstarch mixture and cook, stirring constantly, until thickened.  Sprinkle in the flour and cook for two more minutes, stirring contantly.  Cool slightly and pour into pie shell.  Bake at 450*F for 15 minutes and then lower the heat to 350*F and continue baking for another 30 minutes.  The center will be set but slightly jiggly and the pie will have puffed up.  Let cool completely before cutting.  Make one 9″ pie.

Orange Cranberry Pecans

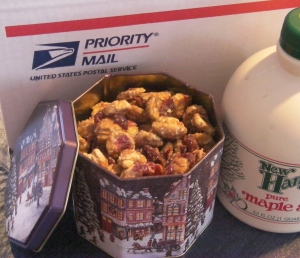
Make this…really, you need to make this.  I can’t send it to all of you and you need to taste these pecans, they are wonderful, amazing and very addictive.  I don’t know why you are still sitting there, go out and buy the ingredients…right now…go!

Orange Cranberry Pecans

Juice and zest of one orange

1/2 cup brown sugar

1/2 cup white sugar

1/2 tsp salt

1/2 tsp pepper

4 cups toasted pecans (toast at 350*F for six minutes)

1 pkg Craisins

In a medium saucepan combined the orange juice, zest, sugars, salt and pepper.  Bring to a rolling boil and add the pecans a handful at a time.  When all the nuts are added continue to cook until the liquid is absorbed.  Take the pan off the heat and add the Craisins and then stir until the nuts are dry.  Spread on wax paper and let cool completely.  Store in an airtight container.

Note:  I have made this a few more time now and I think there are too many cranberries…so I would advise cutting the amount of cranberries called for in the recipe in half.

Chococococans…are you intrigued?

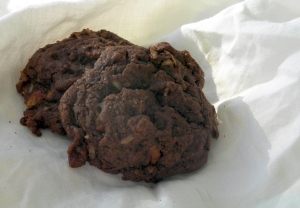
I have been working on a new cookie recipe for a while.  I started out wanting something that reminded me of Samoas, the Girl Scout cookies, with chocolate, coconut, and caramel.  My first attempt was okay, kind of brownie like but not chocolaty or coconuty enough.  Surprisingly the caramel was a distraction so was quickly dropped from the recipe.  I ended up adding some toasted pecans because how can you go wrong with toasted pecans?  This is now a pretty perfect chocolate cookie, nicely flavored with coconut and the pecans add a great toasted crunch.  After much thought my husband has declared them his new favorite cookie, a decision that he did not take lightly!

Now, you are probably wondering about the name.  I was trying to think of something to call them when my husband helpfully suggested Chococococans.  I immediately rejected such a silly suggestion, how would anyone remember that? Or know how to pronounce it?  So David started a marketing campaign for his name, the slogan is “like sex with an Aztec God” and he even designed a logo.

In the meantime my Dad suggested Gilligans as a name, which I liked but by that time everyone was calling them Chococococans and so I have been out voted.   So here is the world premiere of Chococococans…

Chococococans

1 ¾ cups white wheat flour

½ cup cocoa

1 tsp baking soda

½ tsp baking powder

½ tsp salt

2/3 cup canola oil

¼ cup sugar

¾ cup brown sugar

2 oz. melted bittersweet chocolate

½ cup milk

1 Tbsp ground flax seed

½ tsp vanilla extract

½ tsp coconut extract

1 cup coconut

1 cup chopped pecans

Preheat the oven to 350*F.  Line two baking sheets with parchment paper.  On one baking sheet spread out the pecan pieces and toast in the oven for five minutes.  Let cool.  In a medium mixing bowl sift together the flour, cocoa, baking soda, baking powder, and salt.  In a large mixing bowl combined the sugars and oil then add the melted chocolate and milk and mix well.  Add the flax seed and extracts and mix to combined.  Stir in half the dry ingredients until just moistened.  Add the coconut and pecans with the rest of the dry ingredients and stir until the dry ingredients are fully incorporated.  Drop by rounded tablespoon on baking sheets and bake for 10-12 minutes.  Let cool on baking sheet for five minutes and then move to cooling rack to cool completely.  Makes 2 dozen cookies.

A little present for you…

Sorry I have not posted much lately.  My family traveled to Arizona last week to visit my husbands parents.  It was my daughter’s first plane trip and she did great.  She loved waving at all the passengers around us and checking out the view.

Now I am home and working on some new recipes, one especially good one for chocolate coconut cookies!  In the meantime I wanted to share some of my new favorite blogs, consider it my Christmas present to you.  Enjoy!

(never home)maker – A beautiful blog with some great recipes, I want to try the Banana Cake with Chocolate Frosting.

Tongue-N-Cheeky – This is such a fun blog, I love her design and cheeky attitude.  Plus you have to check out the Autumn Sack Lunch, what an amazing post.

Dolce Dente – This site has some great eggless dessert recipes, the eggless Tiramisu sounds amazing!

Uncommon Pumpkin Cheesecake

I have been enjoying developing my own recipes lately and my latest endeavor is a Pumpkin Cheesecake with Chocolate Hazelnut Ganache.  I got the idea when I was trying to think of an entry for the WMUR/Common Man Favorite Holiday Dessert Contest.  I had to tape a video as my entry so you can see me making it here.  I made three cheesecakes in three days to get the recipe right and then do the taping, it was an overload of cheesecake at my house.  Luckily, I have a family that is more than willing to sample my recipes and give comments.

Pumpkin Cheesecake with Chocolate Hazelnut Ganache

Crust:

½ cup toasted hazelnuts

¼ cup sugar

7 graham crackers

1 tsp cinnamon

5 Tbsp melted butter

Preheat the oven to 350*F.  Grind the hazelnuts and sugar in the food processor until roughly chopped.  Add the graham crackers and cinnamon and pulse until fine crumbs.  Dump the crumbs into a 9 inch springform pan and add the melted butter.  Stir together until all the crumbs are moist and then press on the bottom and half way up the sides of the pan to form a crust.  Bake for 10 minutes and then let cool slightly.

Filling:

2 8oz packages of cream cheese, softened

1 aseptic container of firm silken tofu

1 cup light brown sugar

3 Tbsp cornstarch

1 tsp cinnamon

2 tsp vanilla

1 can pumpkin puree

Puree the cream cheese and tofu in the food processor until combined.  Add the brown sugar, cornstarch and cinnamon and blend until smooth, scraping down the sides of the bowl as necessary.  Add the vanilla and pumpkin and blend until uniform, scraping down the sides of the bowl.  Pour into prepared crust and bake for 50-55 minutes or until the center is set but still slightly jiggly.

Ganache:

8 oz semi-sweet chocolate

pinch of salt

1 cup heavy cream

2 tsp hazelnut syrup

½ cup toasted chopped hazelnuts

When the cheesecake is done let it cool for 30 minutes and then make your ganache.  Break the chocolate up into small piece and place in small bowl with the salt.  Heat the cream in the microwave for about 1 minute or until simmering.  Pour the cream over the chocolate and let sit for a few minutes.  Stir the cream and chocolate together until smooth.  Stir in the hazelnut syrup.  Pour the ganache over the cheesecake and tilt the pan to coat the top evenly.  Sprinkle the hazelnuts over the top and press lightly into the ganache.  Chill at least five hours but preferably over night.  Serves 12.

Daring Bakers Challenge: Cannoli

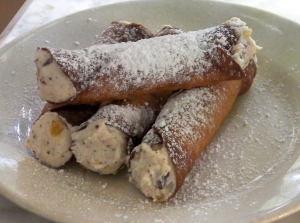
This month I took part in my first Daring Bakers Challenge.  I was so excited to learn that the challenge this month was Cannoli.  When I lived in Boston I lived in the North End, which is the Italian section.  I was surrounded by Italian bakeries filled with delicious pastries that I couldn’t eat because I was gluten free.  Now that I can eat gluten again and make my own cannoli!  This was a great challenge, not too difficult because I have deep fried donuts before and so have experience with the hot oil.  I found the dough a little difficult to work with but once I figured out that I could get it thin enough if I used the pasta machine it was a piece of cake.  I made a full batch of dough but only used half and ended up with 20 shells. The filling is AMAZING!, rich and creamy, definitely better the next day when the candied orange peel had a chance to flavor the cream.  I will definitely be pulling out this recipe from time to time when I get the craving for the North End.

The November 2009 Daring Bakers Challenge was chosen and hosted by Lisa Michele of Parsley, Sage, Desserts and Line Drives. She chose the Italian Pastry, Cannolo (Cannoli is plural), using the cookbooks Lidia’s Italian-American Kitchen by Lidia Matticchio Bastianich and The Sopranos Family Cookbook by Allen Rucker; recipes by Michelle Scicolone, as ingredient/direction guides. She added her own modifications/changes, so the recipe is not 100% verbatim from either book.


CANNOLI SHELLS (This is a half recipe and I got 20 shells)
1 cup all-purpose flour
1 Tbsp sugar
½ tsp unsweetened baking cocoa powder
¼ tsp ground cinnamon
¼ tsp salt
1 ½ Tbsp vegetable or olive oil
1 tsp white wine vinegar (I used cider vinegar)
Approximately 1/4 cup sweet Marsala or any white or red wine you have on hand (I used grape juice)
Vegetable or any neutral oil for frying – about 2 quarts

Note – If you want chocolate cannoli dough, substitute a few tablespoons of the flour (about 25%) with a few tablespoons of dark, unsweetened cocoa powder (Dutch process) and a little more wine until you have a workable dough (Thanks to Audax).

CANNOLI FILLING
2 cups ricotta cheese, drained
1 cup confectioner’s sugar, (more or less, depending on how sweet you want it), sifted
1/2 teaspoon ground cinnamon
1 teaspoon pure vanilla extract or the beans from one vanilla bean
2 ounces of finely chopped, candied orange peel

3 tablespoons (approx. 1 ounce) finely chopped good quality chocolate of your choice (I used semi-sweet chocolate)

Note – If you want chocolate ricotta filling, add a few tablespoons of dark, unsweetened cocoa powder to the above recipe, and thin it out with a few drops of warm water if too thick to pipe.

DIRECTIONS FOR SHELLS:
1. In the bowl of an electric stand mixer or food processor, combine the flour, sugar, cocoa, cinnamon, and salt. Stir in the oil, vinegar, and enough of the wine to make a soft dough. Turn the dough out onto a lightly floured surface and knead until smooth and well blended, about 2 minutes. Shape the dough into a ball. Cover with plastic wrap and let rest in the fridge from 2 hours to overnight.

2. Cut the dough into two pieces. Keep the remaining dough covered while you work. Lightly flour a large cutting or pastry board and roll the dough until super thin, about 1/16 to 1/8” thick (An area of about 13 inches by 18 inches should give you that). Cut out 3 to 5-inch circles (3-inch – small/medium; 4-inch – medium/large; 5-inch- large.  Your choice). Roll the cut out circle into an oval, rolling it larger and thinner if it’s shrunk a little.  (I rolled out the dough as thin as I could and it was still too thick so I then cut circles and used a pasta machine to roll each piece thinner and then cut out my finale circle.)

3. Oil the outside of the cannoli tubes.  Roll a dough oval from the long side (If square, position like a diamond, and place tube/form on the corner closest to you, then roll) around each tube/form and dab a little water on the dough where the edges overlap. (Avoid getting water on the tube, or the pastry will stick to it.) Press well to seal.

4. In a deep heavy saucepan, pour enough oil to reach a depth of 3 inches, or if using an electric deep-fryer, follow the manufacturer’s directions. Heat the oil to 375°F (190 °C) on a deep fry thermometer, or until a small piece of the dough or bread cube placed in the oil sizzles and browns in 1 minute. Have ready a tray or sheet pan lined with paper towels or paper bags.

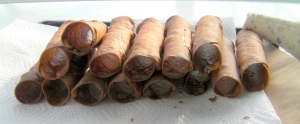
5. Carefully lower a few of the cannoli tubes into the hot oil. Do not crowd the pan. Fry the shells until golden, about 2 minutes, turning them so that they brown evenly.  (I found that my shells browned very quickly and I only fried them for about 45 seconds to 1 minute.)

8. Lift a cannoli tube with a wire skimmer or large slotted spoon, out of the oil. Using tongs, grasp the cannoli tube at one end. Very carefully remove the cannoli tube with the open sides straight up and down so that the oil flows back into the pan. Place the tube on paper towels or bags to drain. Repeat with the remaining tubes. While they are still hot, grasp the tubes with a potholder and pull the cannoli shells off the tubes with a pair of tongs, or with your hand protected by an oven mitt or towel. Let the shells cool completely on the paper towels. Place shells on cooling rack until ready to fill.

9. Repeat making and frying the shells with the remaining dough. If you are reusing the cannoli tubes, let them cool before wrapping them in the dough.

DIRECTIONS FOR FILLING:
1. Line a strainer with cheesecloth. Place the ricotta in the strainer over a bowl, and cover with plastic wrap and a towel. Weight it down with a heavy can, and let the ricotta drain in the refrigerator for several hours to overnight.

2. In a bowl with electric mixer, beat ricotta until smooth and creamy. Beat in confectioner’s sugar, cinnamon, vanilla and blend until smooth.  (My ricotta was a little too drained but I just added some heavy cream and the filling came out perfect.)  Transfer to another bowl and stir in chocolate and zest. Chill until firm. (The filling can be made up to 24 hours prior to filling the shells. Just cover and keep refrigerated).

ASSEMBLE THE CANNOLI:
1. When ready to serve…fill a pastry bag fitted with a 1/2-inch plain or star tip, or a ziplock bag, with the ricotta cream. If using a ziplock bag, cut about 1/2 inch off one corner. Insert the tip in the cannoli shell and squeeze gently until the shell is half filled. Turn the shell and fill the other side. You can also use a teaspoon to do this, although it’s messier and will take longer.

2. Press or dip cannoli in chopped pistachios, grated chocolate/mini chocolate chips, candied fruit or zest into the cream at each end. Dust with confectioner’s sugar and/or drizzles of melted chocolate if desired.